Christmas in July
Get a head start on your stockings, gifts, etc.
Introduction
It takes only an afternoon and some very basic sewing skills to turn a pair of stray socks into a cuddly canine -- and what's better than getting a puppy for Christmas? The colors and patterns of the socks you choose will help inspire the breed: We turned long, brown striped socks into a basset hound disguised as a member of Santa's team, and black-and-white checked anklets into a Scottie. Adding fun details, like pipe-cleaner antlers or a stylish argyle-sock sweater, helps the dogs get dressed up for the holidays.
Step 1
Turn one sock inside out. Cut off the cuff. The calf section becomes the legs; the more you cut off, the shorter the legs will be. (If you're using an anklet, there's no need to cut it off; your dog will have stubby legs.) The toe becomes the neck.
Step 2
Flatten this sock with heel on top. Cut from ankle to beginning of heel. Sew sides to make back legs (leave an opening at the center to insert the stuffing).
Step 3
Turn sock right side out and add stuffing. Stretch and shape as you stuff to form the body and the back legs
Step 4
Sew leg opening shut from side to side. Sew feet shut; bend paws forward at ankle, and stitch the fold in place. Bend neck back, and stitch the fold in place
Step 5
Cut the second sock into parts as shown. (If you're using an anklet, cut off the thin cuff, and cut off the toe -- it will become legs, ears, and tail in step 9.)
Step 6
Slip the head piece over the neck, and sew in place. Add stuffing
Step 7
To make the snout, turn edges of head piece in, making a curve, and stitch shut.
Step 8
For floppy ears (such as the basset hound's), cut toe into ears as shown. Turn each inside out; sew sides together, leaving bottom open. Turn right side out, stitch shut, and sew to head
Step 9
For an anklet, cut toe as shown. Sew ears as in step 8, inserting pipe cleaners for perky ears (like the Scottie's) before sewing to head
Step 10
Turn front-leg pieces inside out; stitch, leaving bottoms open. Turn right side out; stuff, stitch shut, and sew to body. Bend paws; stitch folds in place.
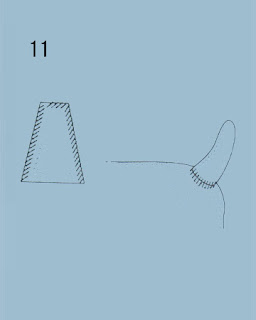
Step 11
Turn tail piece inside out; sew sides, leaving bottom open. Turn right side out; stuff or insert pipe cleaner. Sew on.
Step 12
Sew on small buttons for eyes using different color thread for pupils. For nose, sew on a larger button with two big holes (for nostrils) or a pom-pom.
Step 13
Add finishing touches: For antlers, twist 3 or 4 brown pipe cleaners together for each side, letting ends branch out; make a chin strap from another pipe cleaner, and twist antlers around it to attach. For a sweater, cut off foot of crew or knee sock; slip calf section over dog, mark where front legs fall, then snip holes for legs. For a collar, tie on a ribbon and tuck in a fake holly sprig. Or cut a ribbon band to fit around neck and overlap; place it on dog; sew ends together, folding under raw edges.
From Martha Stewart Crafts


